If you’ve just bought a Blackstone griddle, or have had one for a while and haven’t yet seasoned it, now is the time! Unlike some competing alternatives that come preseasoned, your new Blackstone griddle must be properly seasoned before its first use. This in-depth guide will teach you how to do that.
Seasoning is an important part of cooking on a steel or cast iron griddle and I am not talking about the salt, pepper, and other spices you add to your food. It is the process of coating the griddle with oil and then heating it up causing the oil to polymerize and bind to the metal flat top.
This creates a barrier between the bare metal and the food you are cooking. Acting primarily as a non-stick coating, this barrier also acts as a protective layer that helps prevent rusting and gives the griddle a nice black patina.
Let’s not waste any more time and get started!
Table of Contents
- What Will You Need?
- How To Season a Blackstone Griddle for the First Time
- Remember to Clean the Griddle Before Seasoning
- Do You Need To Season Your Griddle?
- How Often Should You Season Your Blackstone Griddle?
- When Should You Completely Reseason Your Griddle?
- Does the Seasoning Layer Require Maintenance?
- How To Use Blackstone Griddle Seasoning and Cast Iron Conditioner
- Conclusion
- FAQ
- Printable Guide
What Will You Need?
Seasoning requires certain griddle seasoning tools and ingredients. Let’s look at them.
Equipment
Here’s the equipment needed for seasoning.
- A Blackstone griddle (yep)
- Metal spatula or metal grill tongs – used for holding the paper towels so that you don’t get burned
Materials
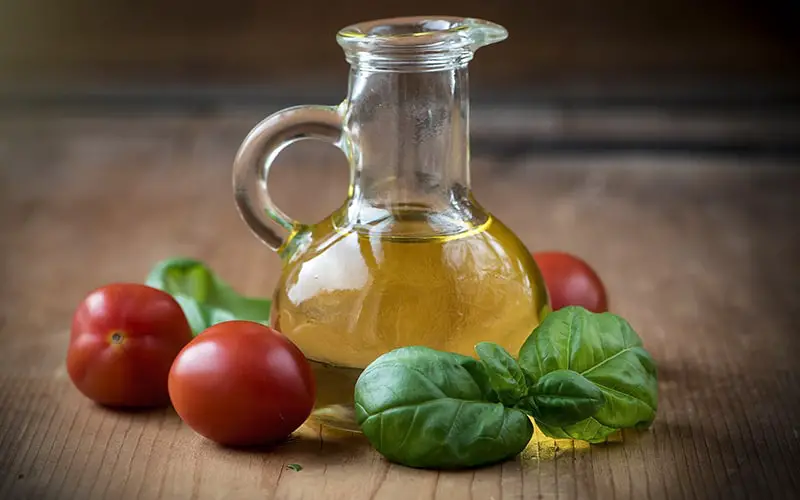
All you are going to need is some kind of oil or shortening. A lot has been said about what type of oil to use for seasoning a griddle. A high smoke point oil is usually recommended but people love to use all kinds of things. Here’s what you can use:
- Vegetable-based oils such as canola oil, sunflower oil, grapeseed oil, or avocado oil are all great oils for Blackstone seasoning
- Paper towels – used for spreading the oil
- Blackstone Griddle Seasoning and Cast Iron Conditioner – a special seasoning blend of various oils, shortening, and beeswax made by Blackstone – alternative to oil, don’t use both at once
How To Season a Blackstone Griddle for the First Time
Once you’ve gathered all the supplies, it’s time to start seasoning the griddle. Here are the step-by-step instructions for Blackstone griddle seasoning.
Optional step – Sand the griddle
Some people like to sand the griddle before they start the seasoning process. This is done to smoothen out the surface as it is usually not completely smooth even brand new. I believe it is not really necessary to do it unless your griddle is badly rusted. If you want to go through with this, then you can use a grill brick or sandpaper.
Step 1: Clean the griddle
The griddle surface must be clean before you start the seasoning process. It’s a valid first step even for a new griddle. After the cleaning is done, wipe the griddle surface with paper towels to dry it.
Step 2: Heat up the griddle
Ignite the griddle and set all the burners on high and let the griddle preheat for 10 to 15 minutes.
The griddle plate will start to show some discoloration caused by the heat and that’s perfectly fine.
Step 3: Oil the griddle
Splash the vegetable oil of your choice on the hot griddle top and spread it around with paper towels. I like to use tongs to hold the paper towels so that I don’t burn myself. You can also fold the paper towel and move it around the griddle with a metal spatula.
Make sure you cover the entire surface of the griddle with a THIN layer of oil. A thin and even coat is the goal here. Don’t use too much cooking oil at once as that may create sticky spots later on. I can’t give you the exact amount of oil to use because it will depend on the size of your griddle. Two or three tablespoons are usually enough.
It’s a good idea to apply the oil not only on the cooking surface but also on the sides. This will help protect the flat top grill from the elements. Seasoning the bottom of the Blackstone is not necessary.
Step 4: Let it smoke
Now, let the griddle do its thing. The oil will start to smoke and that’s normal. Don’t freak out, it’s supposed to happen. The surface of your griddle will start turning black or very dark brown and that’s what we’re looking for.
It will take about 5 minutes for the oil to polymerize. Once it stops smoking turn off the burners and let the griddle cool slightly.
Keep in mind the first layer will never be 100% black. There will be some lighter areas, most often around the edges where the heat is not as intense.
Step 5: Apply more layers
When you are seasoning the griddle for the first time, it’s never enough to do just one layer. So, turn the heat back on high and do another round of seasoning.
I like to do 4 or 5 layers, but it’s really up to you. You can do more but it’s usually not necessary because the seasoning layer will keep building up every time you are cooking on your griddle.
Step 6: Your griddle is ready
Now that you’ve applied enough layers, it’s time to call it a day. Turn off the burners and let the griddle cool down a bit. Apply a thin coat of oil again. This will further protect your griddle.
Now you can store the griddle away. Preferably somewhere dry and cool.
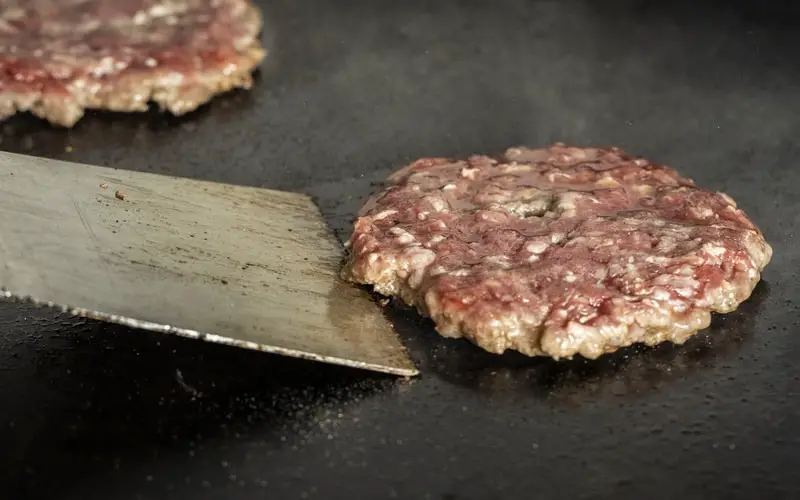
Alternatively, you can skip the last layer of oil and put on some steaks to sizzle because your griddle is now seasoned and ready to be used!

Remember to Clean the Griddle Before Seasoning
Before you start seasoning the griddle, it needs to be thoroughly cleaned. You may be wondering why you need to do this when the griddle is brand new.
Well, it’s because the griddle has traveled a long way before it reached your home. It has been sitting in the factory and warehouse for a while as well. All in all, you want to remove the dust, grime, and grease that has accumulated on it.
For the first cleaning, I would recommend using lukewarm water with a bit of mild dish soap. Some people dislike using soap when cleaning their griddles, but I prefer to clean the griddle as thoroughly as possible before I start seasoning it. If you don’t want to use soap, that’s fine, but make sure you clean the griddle really well before moving on.
The Blackstone guide recommends just pouring the soapy water on the griddle and then rinsing it off. I honestly think that’s not enough. I find that using a sponge or clean cloth is more effective in getting rid of all the dirt and grime.
Once you’re done with the soapy water, rinse the griddle with clean water. You can remove the griddle top from the base at this point to make it easier.
Once you’ve rinsed off all the soapy water, make sure you dry the griddle completely. If it’s hot outside, the griddle top will dry quickly on its own. If you want to speed it up, you can use a clean rag or paper towels to dry it off.
Do You Need To Season Your Griddle?
Seasoning has two main purposes: to create a non-stick surface and to protect the griddle from elements. All the Blackstones have cold-rolled steel tops and when they meet moisture in any form, they will happily rust if you don’t season them.
So, the answer is yes, you do have to season your griddle if you want it to last without having to clean rust off every couple of weeks. The seasoning is also indispensable because of its non-stick properties. Food sticking to the surface of the griddle is not fun and I am sure no one likes their smash burgers or pancakes all torn up into pieces.
How Often Should You Season Your Blackstone Griddle?
Now that the seasoning is clear, you might be wondering how often should you do it.
As I’ve mentioned, seasoning is an important part of taking care of your griddle. As such, you should ideally be seasoning your griddle every time you use it.
Now don’t freak out, I am not saying that you need to do the 4 or 5-layer process each time. You are essentially building up the seasoning each time you cook on the griddle and that alone should be enough. Regular cooking will help maintain the seasoning.
What you also should do after each session is to coat the griddle with a small amount of oil as if you were going to season the surface. It’s quick and easy and done in a minute or so. Simply clean the griddle as you normally do. It’s good to do it when the griddle is still slightly hot. Then splash a bit of oil on the cleaned surface, and spread it all over the griddle top.
And that’s it! Your griddle is now ready to be stored away.
When Should You Completely Reseason Your Griddle?
Your griddle is all set after the initial seasoning but that doesn’t mean you’re done with it forever. There may come a time when you will need to reseason your griddle completely. If the seasoning is intact, you don’t have to reseason it but if it’s heavily damaged, you may sometimes need to start from scratch.
Here are some of the common reasons why you may have to reseason your griddle:
- Flaking or peeling: If you see the seasoning flaking or peeling off heavily, usually the only reliable fix is to remove it and start from scratch
- Deep scratches: If the surface is scratched deeply, it may be time to reseason. Shallow scratches are usually easily repaired by applying another layer of seasoning oil. Deeper scratches however may require complete reseasoning to prevent food from sticking to the scratched areas.
- Rusting: If your griddle is starting to rust excessively, you will have to remove both the seasoning and the oxidized layer and start anew.
Some people also like to start the barbecue season by giving their griddle a fresh start. If you feel like your griddle could use a touch-up, reseasoning is always an option.
Does the Seasoning Layer Require Maintenance?
Although the seasoning is fairly easy to maintain, there are still a few things you should keep in mind to make it last longer:
- Don’t use soap to clean a seasoned griddle – Soap can damage or even remove the seasoning so it’s best to just stick to using oil, water, and a metal spatula when cleaning the griddle.
- Don’t use degreasers for cleaning – Degreasers, as the name itself suggests, will obliterate the seasoning. Degreasers are a great choice when you actually need to remove the seasoning.
- Don’t dig into the seasoning with your spatula – Don’t use the spatula as if you were trying to dig up a hidden pirate’s treasure. Scraping motion is all you need to remove even the most stubborn food residues.
- Use your griddle regularly – Using your griddle regularly is one of the best ways to keep the seasoning in good shape. The more you use it, the better it will be seasoned. You know, griddling is fun and addictive. You can even use your Blackstone in the winter.
How To Use Blackstone Griddle Seasoning and Cast Iron Conditioner
Although I believe it is not necessary to buy special products for seasoning, Blackstone has one in their range and many people are buying it. The main difference between this and cooking oil is that it is not in a liquid form. It’s fairly thick and acts more like a shortening. In fact, it resembles Crisco which can be used for seasoning as well. Of course, when heated it will melt.
Here’s how to use the conditioner instead of regular cooking oil. I won’t go into so much detail because the process is fairly similar to the one outlined before.
- Firstly, start by wiping down the cooking surface with damp paper towels to remove any residue or loose debris. This includes food particles, dust, or any other foreign matter that might interfere with the process. Ensure the griddle is cool and not turned on during this stage for safety.
- After ensuring the griddle is clean, the next step is to heat it up. Turn on your burners and let your griddle warm up for about 10-15 minutes.
- Now that your griddle is heated, you can begin the seasoning process. Apply a small dollop of the conditioner to the surface. Then, take a pair of tongs and a wad of paper towels to spread it around. Use the paper towel to carefully and evenly spread the seasoning product across the surface, paying attention to the edges and sides of the griddle.
- Once the griddle is evenly coated, leave it to heat until it starts smoking. The heat will cause the oil to polymerize, forming a non-stick protective layer on the griddle.
- Once the smoking stops, repeat the process of applying the conditioner, spreading it, and letting it smoke off. This should be done at least three times, but you can go up to five times or more to build a good layer of seasoning. The goal is to achieve a smooth, dark, and slightly shiny surface.
Conclusion
Seasoning a Blackstone griddle is an easy process that should not be skipped unless you want to turn your new toy into an ugly piece of orange metal. The better job you do the better the cooking experience and the protection from the elements.
Almost any vegetable-based oil can be used for the process. No need to buy anything fancy. The key to successful seasoning is to apply as thin a layer of oil as possible. Add too much in one go and you are in for some troubles down the road.
Happy griddling and seasoning!
FAQ
Can I season my Blackstone griddle in the oven?
Yes, technically, you can season your Blackstone griddle in an oven. The problem is, the larger griddle tops will surely not fit inside any home oven. If you are an owner of one of the smaller models, you can season the top in the oven, but I think it’s easier and quicker to do it as described in this guide.
In-oven seasoning is often the preferred way of seasoning cast iron skillets.
Can I season my Blackstone griddle with bacon grease?
Bacon is specifically not recommended to be used for the first seasoning layers because it contains salt which may cause the seasoning to dry out and flake off.
What is the best oil for seasoning?
Canola oil works best for me but any type of oil with a high smoke point will work.
Some people swear by avocado oil or grapeseed oil. I find them too expensive to just burn them off and prefer to use them for cooking.
Do Blackstone Griddles Come Pre-Seasoned?
Blackstone griddles are not shipped pre-seasoned. You will have to apply the seasoning yourself.
Do I have to season an electric Blackstone griddle?
No, electric griddles usually come with a non-stick coating that doesn’t require seasoning.
Printable Guide

How To Season a Blackstone Griddle
Equipment
- A Blackstone griddle
- Metal spatula or tongs (used for holding the paper towels so that you don’t get burned)
Materials
- Oil of your choice (I use mostly canola oil)
- Paper towels (used for spreading the oil)
- Blackstone Griddle Seasoning and Cast Iron Conditioner (alternative to oil)
Instructions
- Clean the griddle – The griddle surface must be clean before you start the seasoning process. It’s a valid first step even for a new griddle. After the cleaning is done, wipe the griddle surface with paper towels to dry it.
- Ignite the griddle and set all the burners on high and let the griddle preheat for 10 to 15 minutes.The griddle plate will start to show some discoloration caused by the heat and that’s perfectly fine.
- Splash the vegetable oil of your choice on the hot griddle top and spread it around with paper towels. I like to use tongs to hold the paper towels so that I don’t burn myself. You can also fold the paper towel and move it around the griddle with a metal spatula.
- Make sure you cover the entire surface of the griddle with a THIN layer of oil. A thin and even coat is the goal here. Don’t use too much cooking oil at once as that may create sticky spots later on. I can’t give you the exact amount of oil to use because it will depend on the size of your griddle. Two or three tablespoons are usually enough. It’s a good idea to apply the oil not only on the cooking surface but also on the sides. This will help protect the flat top grill from the elements. Seasoning the bottom of the Blackstone is not necessary.
- Now, let the griddle do its thing. The oil will start to smoke and that’s normal. Don’t freak out, it’s supposed to happen. The surface of your griddle will start turning black or very dark brown and that’s what we’re looking for. It will take about 5 minutes for the oil to polymerize. Once it stops smoking turn off the burners and let the griddle cool slightly. Keep in mind the first layer will never be 100% black. There will be some lighter areas, most often around the edges where the heat is not as intense.
- When you are seasoning the griddle for the first time, it’s never enough to do just one layer. So, turn the heat back on high and do another round of seasoning. I like to do 4 or 5 layers, but it’s really up to you. You can do more but it’s usually not necessary because the seasoning layer will keep building up every time you are cooking on your griddle.
- Now that you’ve applied enough layers, it’s time to call it a day. Turn off the burners and let the griddle cool down a bit. Apply a thin coat of oil again. This will further protect your griddle. Now you can store the griddle away. Preferably somewhere dry and cool. Alternatively, you can skip the last layer of oil and put on some steaks to sizzle because your griddle is now seasoned and ready to be used!
